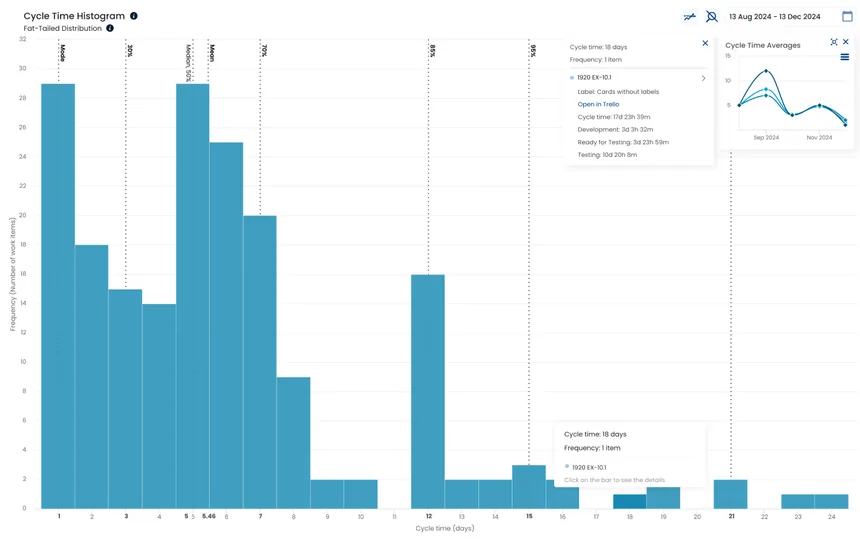
Cycle Time Histogram
Compare its average cycle time with the average cycle time from your CFD. When the values are roughly equal, delivery becomes more predictable and easier to manage.
What it answers
Where is work getting stuck?
See how work flows over time and identify bottlenecks in your process.
Example

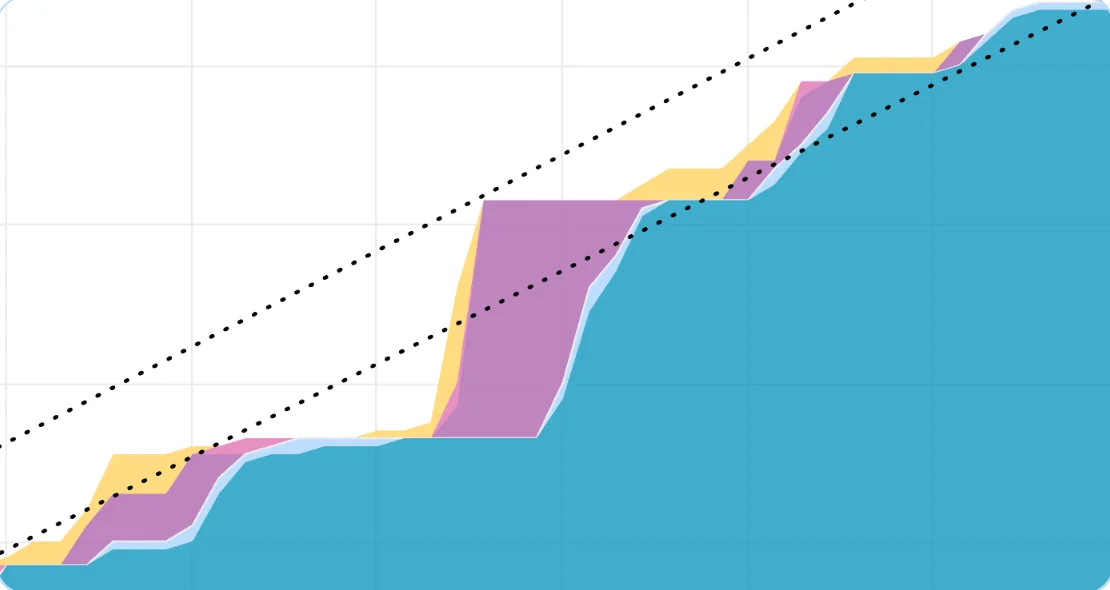
Each colored area represents a status in your board. Its size indicates how many work items are currently in that status.
The bottom line represents the ‘Done’ state and shows the total amount of delivered work. Its slope between two points indicates average throughput.
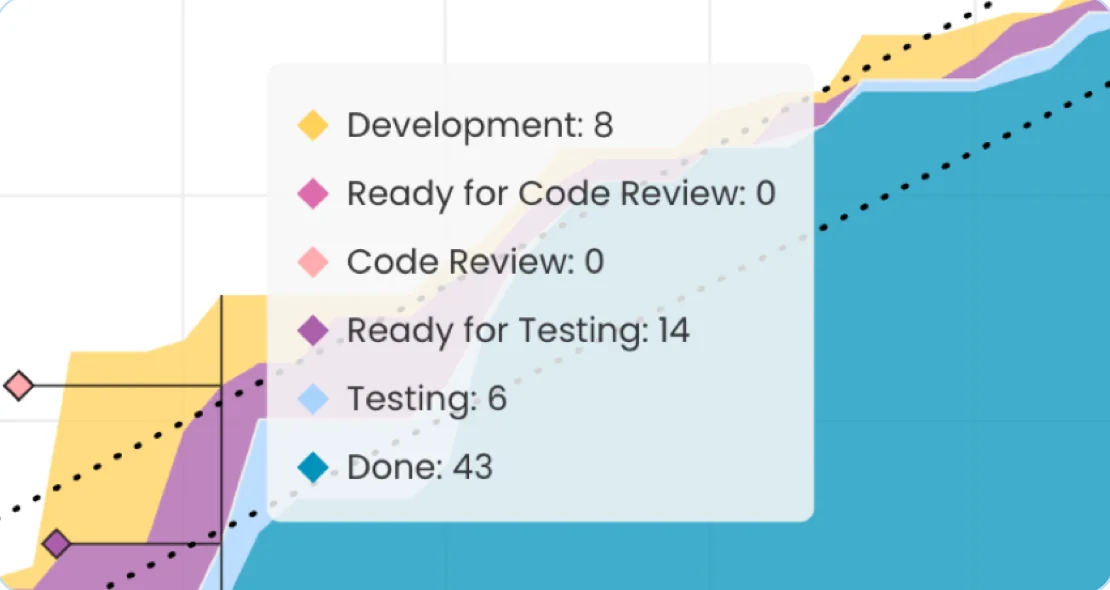
Hover over the graph to see the number of items in each process state on a selected date. Switch between 'process' and 'states' to see total WIP or WIP by status.
The horizontal distance between the top and bottom lines of a CFD area shows approximate average cycle time. It indicates how long items completed on the selected day took on average.
The top line represents the arrival rate of tasks. It shows the rate at which you start new work.
Each colored area in the Cumulative Flow Diagram (CFD) represents a status in your board. The horizontal axis shows time, and the vertical axis shows the number of tasks in your statuses. The size of each area indicates how many work items are currently in that status.
Keep the number of tasks in progress within your WIP limits. This makes delivery faster, smoother, and more predictable.
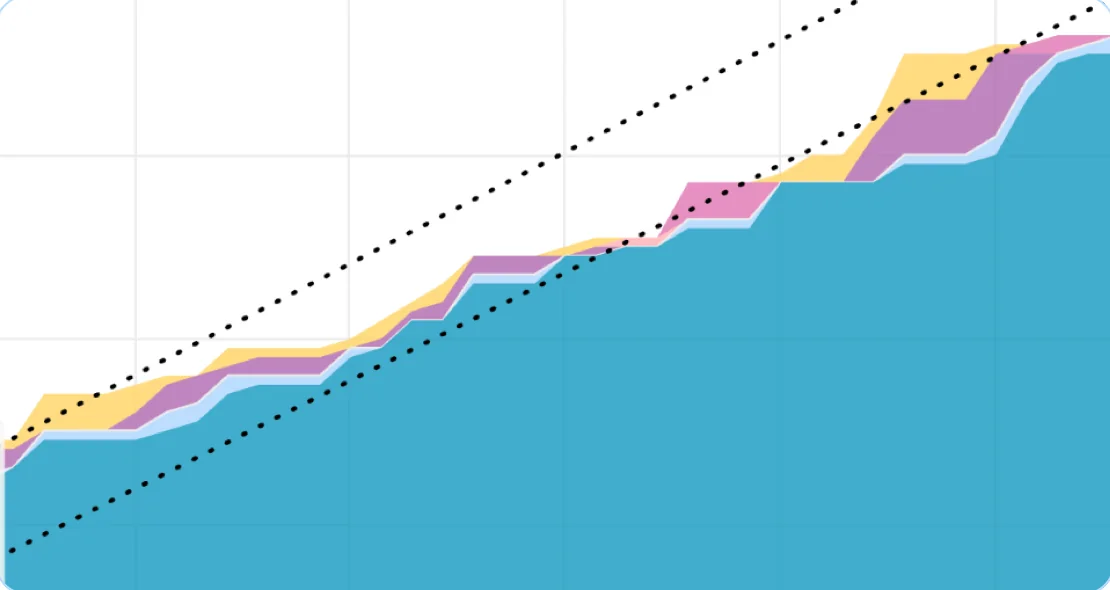
Hover over the graph to see the number of items in each process state on a selected date. You can also see the accumulated number of completed tasks in the ‘Done’ state during the selected time frame.
Switch between 'process' and 'states' in the WIP tooltip to see your total WIP or the WIP in each status on your board.
The horizontal distance between the top and bottom lines of a CFD area shows your process's approximate average cycle time. It indicates how long items completed on the selected day took on average.
Compare the average cycle times in your CFD and Cycle Time Histogram. When the values are roughly equal, delivery becomes more predictable and easier to manage.
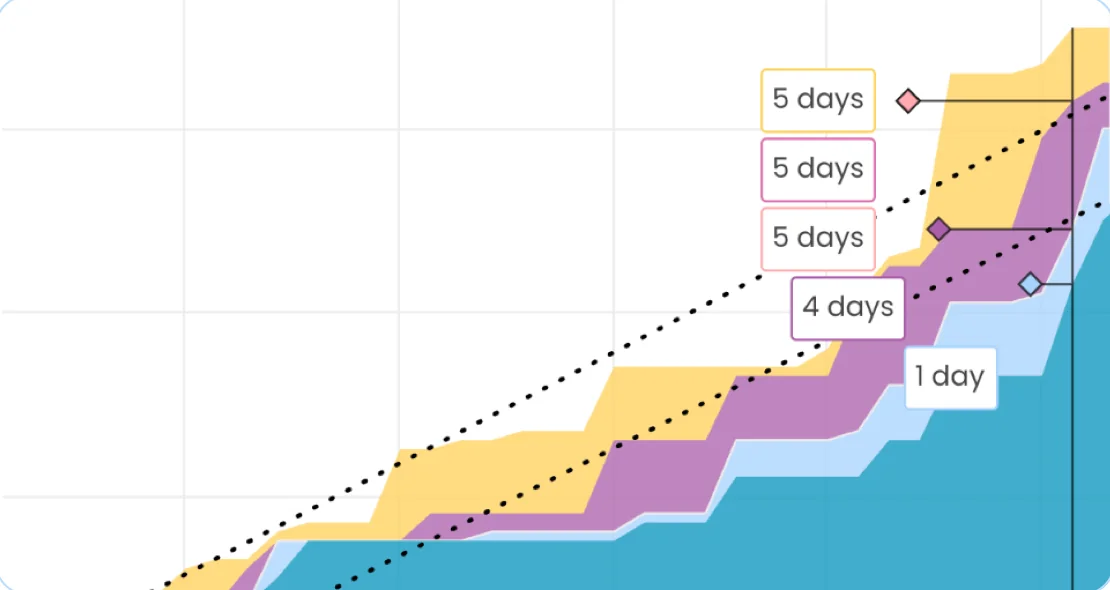
The bottom line of the CFD represents the ‘Done’ state. It shows the total amount of work your team has delivered. The slope between any two points indicates the average throughput between those points.
A productive, self-organized team completes tasks quickly, so the ‘Done’ area grows rapidly. Watch for a flatter gradient. The slower this area grows, the longer your delivery times are.
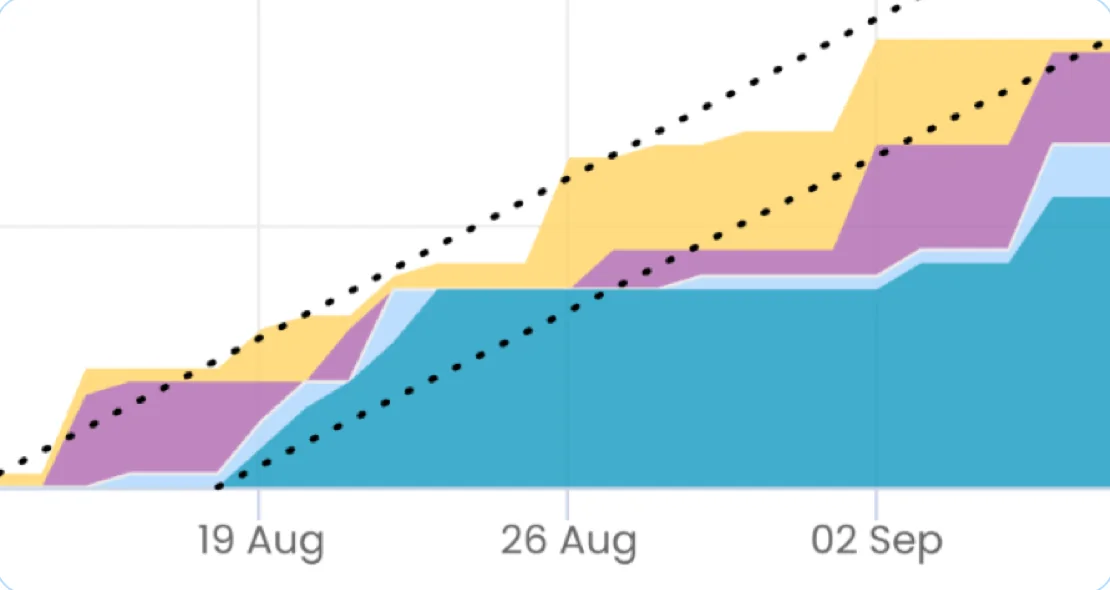
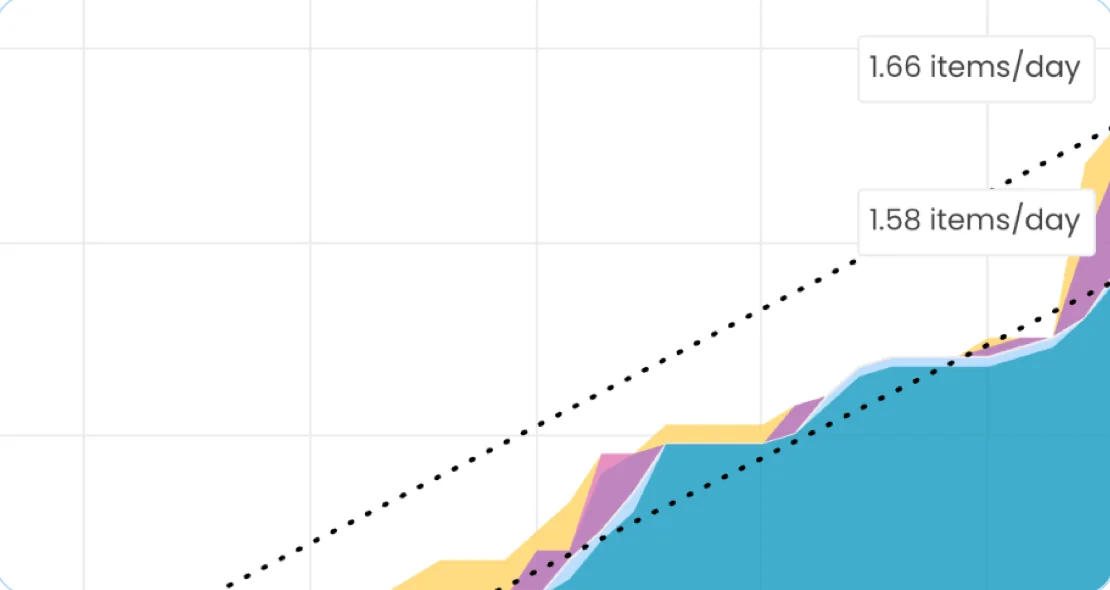
The top line shows the arrival rate of tasks, while the bottom line shows their departures. These are the rates at which you start new work and finish outstanding work.
Keep WIP as consistent as possible to achieve a predictable workflow. When WIP is consistent, the arrival rate and departure rate lines grow in sync and the distance between them stays equal.
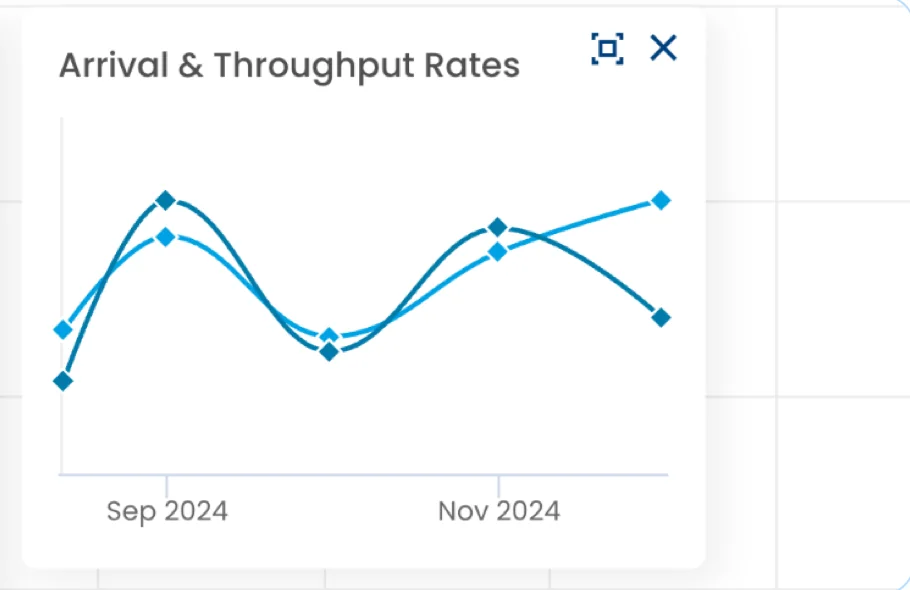
The ‘Arrival & Throughput Rates’ widget shows how your arrival and throughput rates change during the selected time frame. Ideally, the lines should overlap.
Switch between the line chart and a stacked bar view. The stacked bars show arrivals and throughput side by side for each period, broken down by Work Type, Labels, or Request Type.
Use the legend to filter the chart and hover for more context. A summary table shows net accumulation by work type, and you can export the view as an image, CSV, or PDF.
When the arrival line goes up, you are starting work faster than you finish it and handling more tasks than the team can manage at once. A higher arrival rate increases WIP and usually leads to increased cycle time, reduced team efficiency, and potential delays.
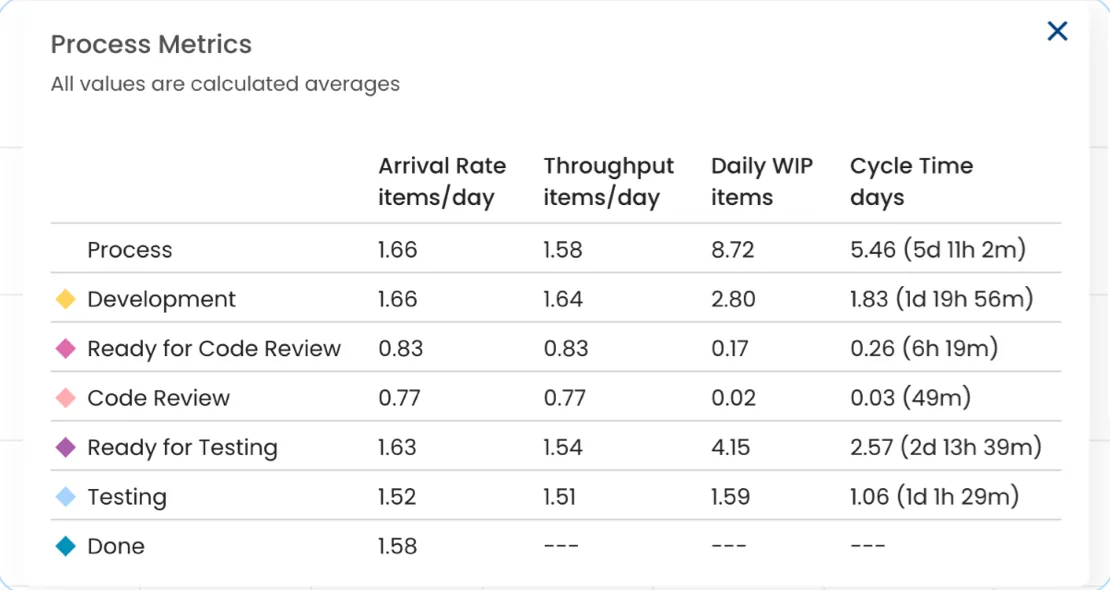
Review the averages of your flow metrics to check whether work is being started and completed at a consistent pace. Identify statuses where tasks may be piling up, and analyze cycle time to find where work takes the longest.
According to Little's Law, Average Cycle Time = Average Work In Progress / Average Throughput. The more accurately the equation holds, the healthier your process. If it breaks down, take a closer look at your management practices.
The Cumulative Flow Diagram shows the amount of work in each state of your process. When an area representing WIP starts expanding, it indicates a bottleneck in that state and a problem in your workflow.
Before drawing conclusions, account for changes such as team size or public holidays. They may explain unexpected spikes in activity.
You can export the filtered data shown in this chart as a CSV.
An expanding area that represents WIP indicates a bottleneck in that state and a problem in the workflow.
Look for a band whose upper line is steeper than its lower line. This represents mismatched arrivals and departures.
Flat lines represent periods with zero departures, when no tasks are completed or moved to the next downstream process state. This indicates that something is blocking the process.
Compare its average cycle time with the average cycle time from your CFD. When the values are roughly equal, delivery becomes more predictable and easier to manage.
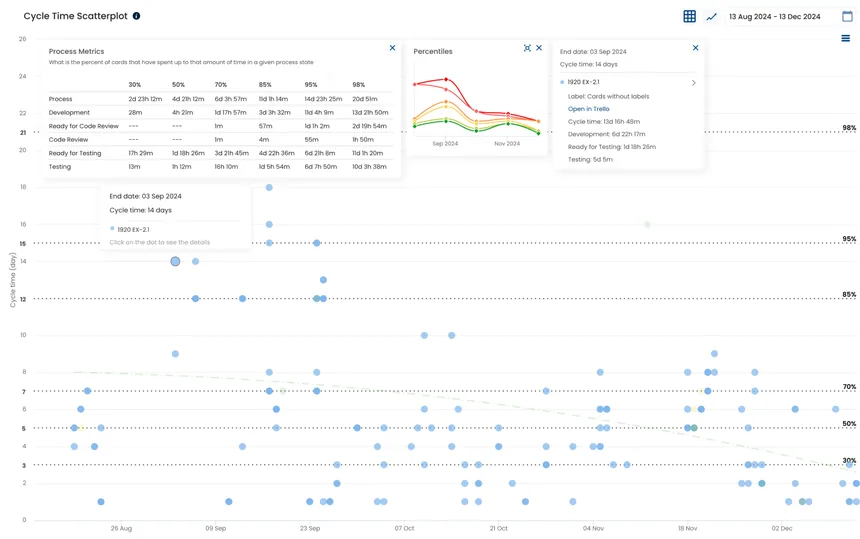
Check whether its average cycle time closely tracks the value in the Cumulative Flow Diagram. If it does not, you are accumulating flow debt.
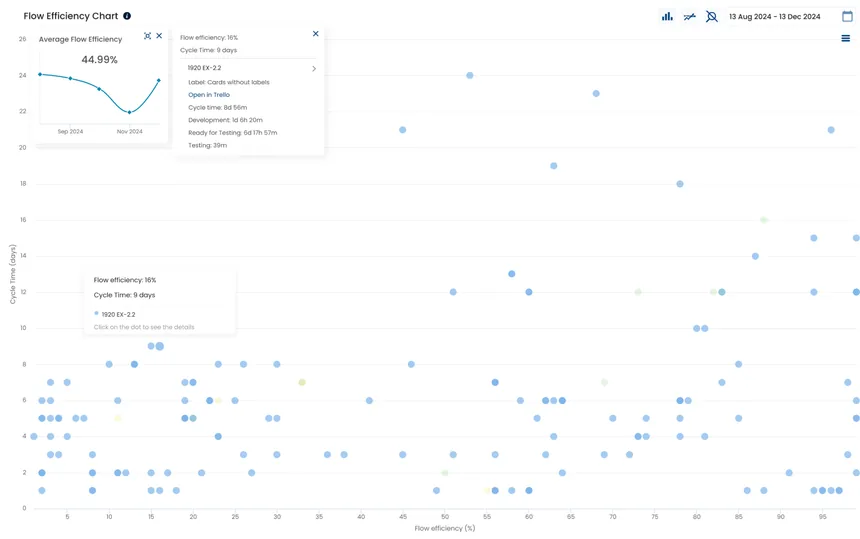
Use it to track the flow efficiency of work items and your average flow efficiency. After identifying tasks with the longest waiting times, consider the reasons for their delays.
Connect your existing delivery data and start exploring your flow.